| Categories | Carrier HVAC Manuals, HVAC Heating Ventilating Air Conditioning Manuals |
|---|---|
| Tags | Carrier 50ES |
| Download File |
|
| Language | English |
| Product Brand | Support Phone Number: In North America, please call 1-800-CARRIER for immediate customer assistance from 8:00a -5:00p (EST) weekdays, Heating, Ventilating and Air Conditioning - HVAC |
| Document File Type | |
| Publisher | corp.carrier.com |
| Wikipedia's Page | Carrier Corporation |
| Copyright | Attribution Non-commercial |
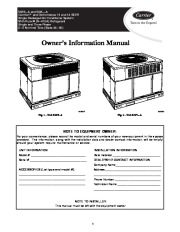
50ES–A and 50VL–A ComfortTM and Performance 13 and 14 SEER Single Packaged Air Conditioner System With Puronr (R–410A) Refrigerant Single and Three Phase 2–5 Nominal Tons (Sizes 24–60) Owner’s Information Manual A09034 A09033 Fig. 1 – Unit 50ES-A Fig. 2 – Unit 50VL-A NOTE TO EQUIPMENT OWNER: For your convenience, please record the model and serial numbers of your new equipment in the spaces provided.
This information, along with the installation data and dealer contact information, will be helpful should your system require maintenance or service. UNIT INFORMATION Model # _ Serial # __ ACCESSORIES (List type and model #) INSTALLATION INFORMATION Date Installed __ DEALERSHIP CONTACT INFORMATION Company Name _ Address __ Phone Number _ Technician Name __ NOTE TO INSTALLER: This manual must be left with the equipment owner. 1 SAFETY CONSIDERATIONS Improper installation adjustment, alteration, service, maintenance, or use can cause explosion, fire, electrical shock, or other conditions which may cause death, personal injury, or property damage. Consult a qualified installer, service agency, or your distributor or branch for information or assistance. The qualified installer or agency must use factory-authorized kits or accessories when modifying this product Refer to the individual instructions packaged with the kits or accessories when installing. Follow all safety codes. Wear safety glasses, protective clothing, and work gloves. Use quenching cloth for brazing operations. Have a fire extinguisher available. Read these instructions thoroughly and follow all warnings or cautions included in literature and attached to the unit. Consult local building codes, the current editions of the National Electrical Code (NEC) NFPA 70. In Canada refer to the current editions of the Canadian electrical Code CSA C22.1. Recognize safety information. This is the safety-alert symbol. When you see this symbol on the unit and in instructions or manuals, be alert to the potential for personal injury. Understand these signal words; DANGER, WARNING, and CAUTION. These words are used with the safety-alert symbol. DANGER identifies the most serious hazards which will result in severe personal injury or death. WARNING signifies hazards which could result in personal injury or death. CAUTION is used to identify unsafe practices which may result in minor personal injury or product and property damage. NOTE is used to highlight suggestions which will result in enhanced installation, reliability, or operation. Note: Installer: This manual should be left with the equipment user. ! CUT HAZARD CAUTION Failure to follow this caution may result in personal injury. When removing access panels or performing maintenance functions inside your unit, be aware of sharp sheet metal parts and screws. Although special care is taken to reduce sharp edges to a minimum, be extremely careful when handling parts or reaching into the unit. ! WARNING FIRE, EXPLOSION, ELECTRICAL SHOCK HAZARD Failure to follow this warning could result in personal injury, death or property damage. Do not use this unit if any part has been under water. Immediately call a qualified service technician to inspect the unit and to replace any part of the control system which has been under water. Starting or Shutting Unit Off To start the unit: 1. Turn on the electrical power supply to unit. 2. Select temperature and set MODE control to desired mode. To shut unit off: Note: If the unit is being shut down because of a malfunction, call your dealer as soon as possible. 1. Set system MODE control to OFF.


