| Categories | Carrier HVAC Manuals, HVAC Heating Ventilating Air Conditioning Manuals |
|---|---|
| Tags | Carrier 73ACA |
| Download File |
|
| Language | English |
| Product Brand | Support Phone Number: In North America, please call 1-800-CARRIER for immediate customer assistance from 8:00a -5:00p (EST) weekdays, Heating, Ventilating and Air Conditioning - HVAC |
| Document File Type | |
| Publisher | corp.carrier.com |
| Wikipedia's Page | Carrier Corporation |
| Copyright | Attribution Non-commercial |
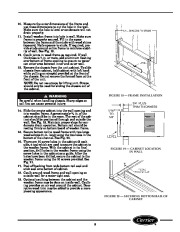
ACA SERIES INSTALLATION INSTRUCTIONS This installation instruction is for 73ACA121T air conditioning units. Read entire installation instructions before proceeding with installation. WIRING The air conditioner is powered by plugging it into a compatible wall outlet. The electrical outlet MUST match the plug on the unit power cord. The unit nameplate contains unit electrical data, unit ratings, and identification numbers.
Heating, Ventilating and Air Conditioning User Manual Free Download. HAVC Operator’s Manual. Auto AC Free Instruction Manual Download PDF.
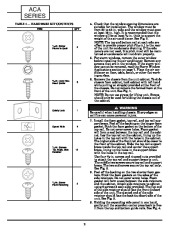
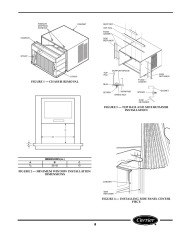
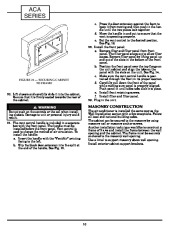
The unit nameplate is located inside the front grille. Do not use a plug adapter or an extension cord. CONTENTS Page REQUIRED TOOLS . 1 INSTALLATION .1-10 WIRING 1 WINDOW INSTALLATION 1 STORM WINDOW APPLICATIONS 7 WALL INSTALLATION 8 MASONRY CONSTRUCTION . 10 Electrical shock can cause injury or death. Do not, under any circumstances, cut, remove, or bypass the grounding prong on the power plug. Check available power supply and resolve any wiring problems before installing and operating the air conditioner. If wiring is required, all wiring must comply with all local and national electrical codes. All wiring must be installed by a qualified electrician. If you have any questions regarding the unit electrical data or wiring, consult a qualified electrician before installation. For your safety, this air conditioner is grounded through the power cord plug when plugged into a matching wall outlet. REQUIRED TOOLS · · large flat-blade screwdriver No. 2 Phillips screwdriver pencil level measuring tape drill 1/ and 1/ -in. drill bits 8 4 utility knife WINDOW INSTALLATION To install the room air conditioner in a window, perform the following procedure. 1. Remove air conditioner from shipping box. Cut the plastic band around the air conditioner before lifting. Do not use the plastic band to lift the air conditioner. Check contents of hardware kit (plastic bag). See Table 1. Make sure all the items are in the plastic bag. Front grille and vent control are shipped in a separate box inside the air conditioner box. 2. Remove two shipping screws from the top of the unit. Discard screws. See Fig. 1. 3. Determine which window will be used for installation. Make sure there is adequate clearance on the inside and outside of the window. Ensure that the power cord will reach the available socket without an extension cord. Power cord is 48-in. long. A double-hung window type must be used for the installation location. The Spanish section follows the French section in this manual. La sección en español aparece después de la sección en francés en este manual. INSTALLATION Electrical shock can cause injury or death. Do not install unit or remove front grille with the power cord plugged in. Be sure unit is unplugged before performing any installation or maintenance. Your Carrier room air conditioner can be installed in two different ways: window installation or wall installation. The window installation is less complicated and does not require a hole be cut in the wall, but the use of the window where it is installed is limited. The wall installation is more permanent and does not affect the use of a window in the room, but more complicated construction work is required.
