
| Categories | Agricultural Equipment and Harvesting Machinery Manuals, New Holland Agricultural Equipment Manuals |
|---|---|
| Tags | New Holland TC35DA, New Holland TC40DA, New Holland TC45DA |
| Download File |
|
| Document File Type | |
| Copyright | Attribution Non-commercial |
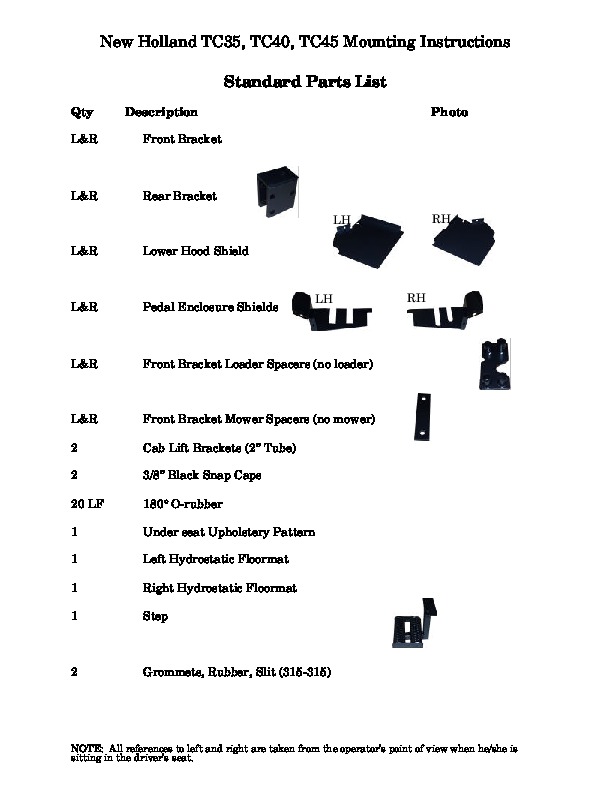
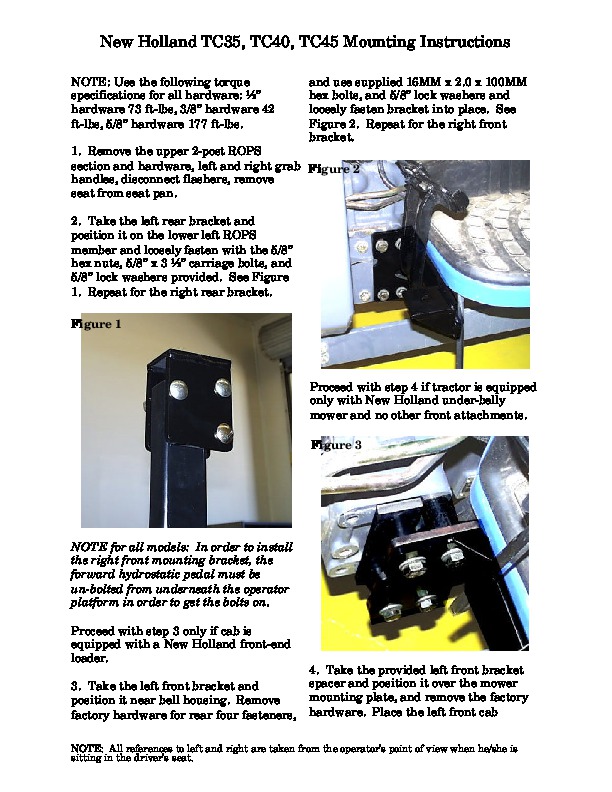
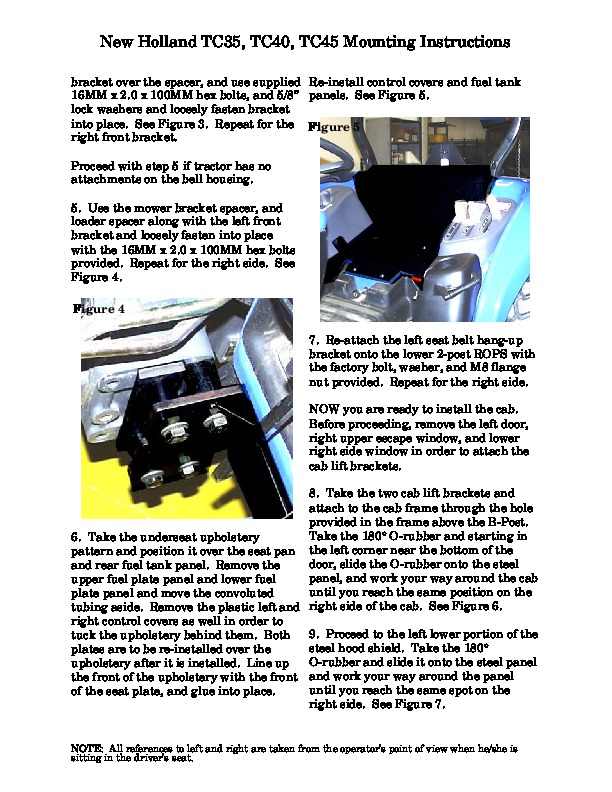
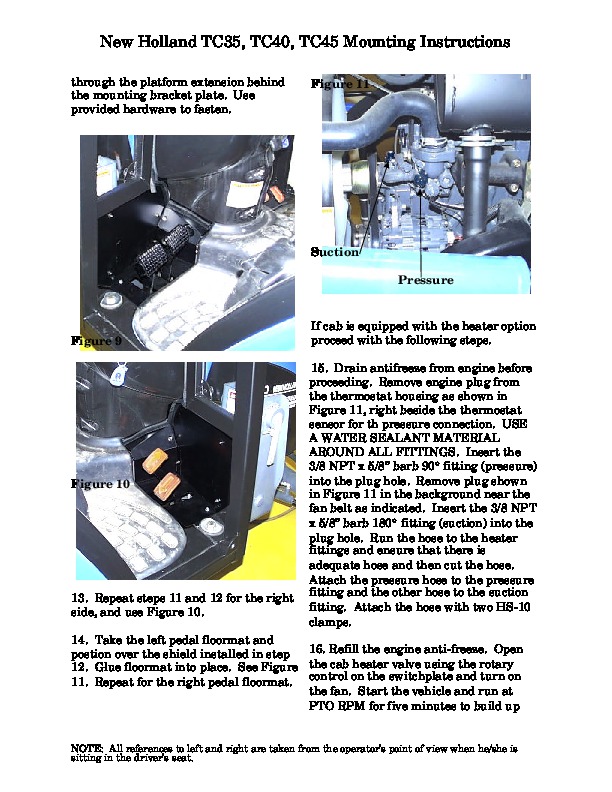
New Holland TC35DA, TC40DA, TC45DA Parts List & Mounting Instructions Jodale · Perry Printed: 2004/08 New Holland TC35, TC40, TC45 Mounting Instructions Standard Parts List Qty L&R Description Front Bracket Photo L&R Rear Bracket LH RH L&R Lower Hood Shield L&R Pedal Enclosure Shields LH RH L&R Front Bracket Loader Spacers (no loader) L&R 2 2 20 LF 1 Front Bracket Mower Spacers (no mower) Cab Lift Brackets (2 ” Tube) 3/8 ” Black Snap Caps 180° O-rubber Under seat Upholstery Pattern Left Hydrostatic Floormat Right Hydrostatic Floormat Step 2 Grommets, Rubber, Slit (315-315) NOTE: All references to left and right are taken from the operator’s point of view when he/she is sitting in the driver’s seat.
Agricultural Equipment Manual Free Download. Lawn Mowers Specs. Power Harvesting Machinery Free Specification Download PDF.
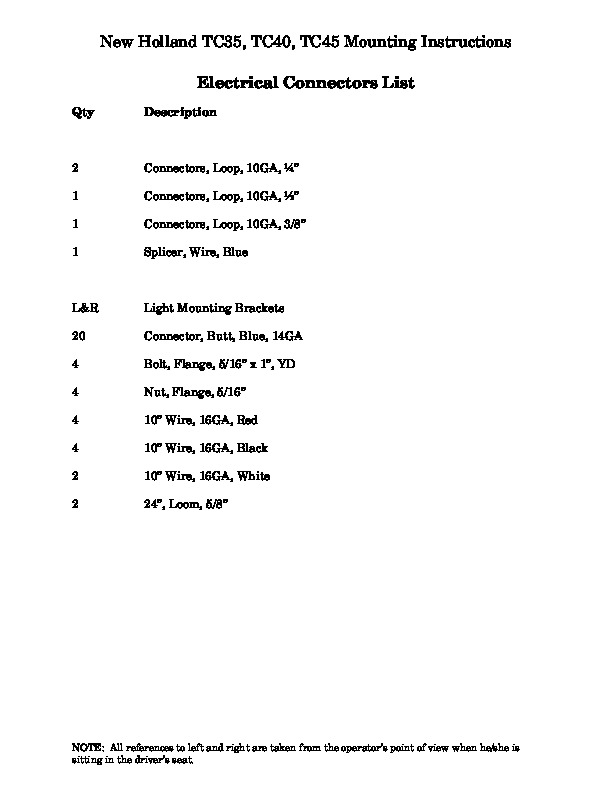
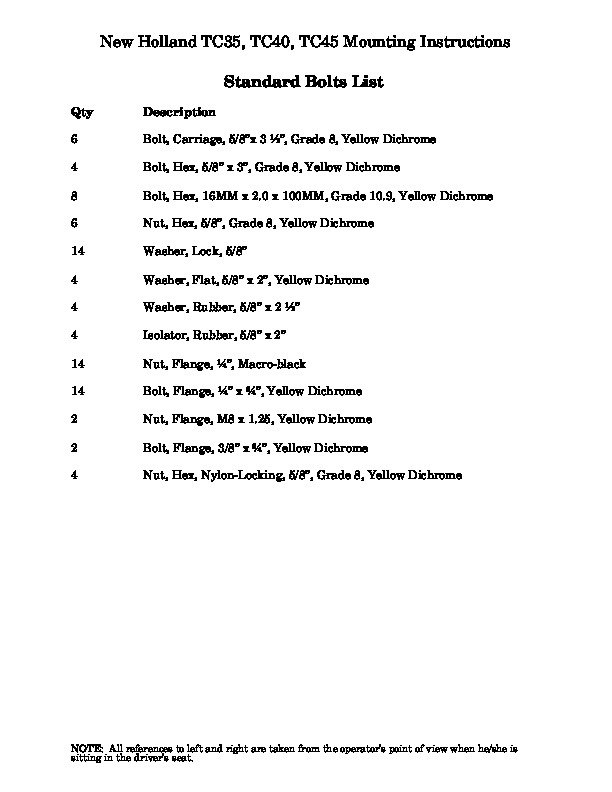
New Holland TC35, TC40, TC45 Mounting Instructions Electrical Connectors List Qty Description 2 Connectors, Loop, 10GA, ¼ ” Connectors, Loop, 10GA, ½ ” Connectors, Loop, 10GA, 3/8 ” Splicer, Wire, Blue L&R 20 4 4 4 4 2 2 Light Mounting Brackets Connector, Butt, Blue, 14GA Bolt, Flange, 5/16 ” x 1 “, YD Nut, Flange, 5/16 ” 10 ” Wire, 16GA, Red 10 ” Wire, 16GA, Black 10 ” Wire, 16GA, White 24 “, Loom, 5/8 ” NOTE: All references to left and right are taken from the operator’s point of view when he/she is sitting in the driver’s seat. New Holland TC35, TC40, TC45 Mounting Instructions Standard Bolts List Qty Description Bolt, Carriage, 5/8 “x 3 ½ “, Grade 8, Yellow Dichrome Bolt, Hex, 5/8 ” x 3 “, Grade 8, Yellow Dichrome Bolt, Hex, 16MM x 2.0 x 100MM, Grade 10.9, Yellow Dichrome Nut, Hex, 5/8 “, Grade 8, Yellow Dichrome Washer, Lock, 5/8 ” Washer, Flat, 5/8 ” x 2 “, Yellow Dichrome Washer, Rubber, 5/8 ” x 2 ½ ” Isolator, Rubber, 5/8 ” x 2 ” Nut, Flange, ¼ “, Macro-black Bolt, Flange, ¼ ” x ¾ “, Yellow Dichrome Nut, Flange, M8 x 1.25, Yellow Dichrome Bolt, Flange, 3/8 ” x ¾ “, Yellow Dichrome Nut, Hex, Nylon-Locking, 5/8 “, Grade 8, Yellow Dichrome NOTE: All references to left and right are taken from the operator’s point of view when he/she is sitting in the driver’s seat. New Holland TC35, TC40, TC45 Mounting Instructions Optional Parts Lists Heater Option (if equipped) Qty 1 1 2 30 LF Description 3/8 NPT x 5/8 ” barb 180° fitting (suction) 3/8 NPT x 5/8 ” barb 90° fitting (pressure) HS-10 Hose Clamps 5/8 ” Heater Hose Photo NOTE: All references to left and right are taken from the operator’s point of view when he/she is sitting in the driver’s seat. New Holland TC35, TC40, TC45 Mounting Instructions NOTE: Use the following torque specifications for all hardware: ½ ” hardware 73 ft-lbs, 3/8 ” hardware 42 ft-lbs, 5/8 ” hardware 177 ft-lbs. and use supplied 16MM x 2.0 x 100MM hex bolts, and 5/8 ” lock washers and loosely fasten bracket into place. See Figure 2. Repeat for the right front bracket. 1. Remove the upper 2-post ROPS section and hardware, left and right grab Figure 2 handles, disconnect flashers, remove seat from seat pan. 2. Take the left rear bracket and position it on the lower left ROPS member and loosely fasten with the 5/8 ” hex nuts, 5/8 ” x 3 ½ ” carriage bolts, and 5/8 ” lock washers provided. See Figure 1. Repeat for the right rear bracket. Figure 1 Proceed with step 4 if tractor is equipped only with New Holland under-belly mower and no other front attachments. Figure 3 NOTE for all models: In order to install the right front mounting bracket, the forward hydrostatic pedal must be un-bolted from underneath the operator platform in order to get the bolts on. Proceed with step 3 only if cab is equipped with a New Holland front-end loader. 3. Take the left front bracket and position it near bell housing. Remove factory hardware for rear four fasteners.